Get Well Salad

I don’t know about you, but I don’t get sick. Never, not ever. So we’re gonna call whatever I’m experiencing this weekend simply me “feeling under the weather”. That works for me. I will admit to sickness when I’m throwing up, hacking up a lung, or delirious with fever. I’m not any of those things today. Still, it’s really no fun feeling under the weather. I slept ’til 10, woke up, made breakfast, and went back to bed ’til 2. Probably sounds like the average weekend for high school students, but I’m generally up and at ’em at 8 on Sunday morning. Also, my nose is raw and red from wiping all the stuff that won’t stop pouring out of it. TMI maybe, but that’s what’s happening around here. And did I mention my head feels like it’s going to explode at any moment? Yuck.

For dinner, I decided the smartest thing would be to throw all of the healthiest, vitamin-rich, healing foods in my kitchen in a bowl. I have a sneaking suspicion that I’ll feel like superwoman in the morning!

Get Well Salad
Serves 1 under-the-weather person

Ingredients:
2 cups chopped kale
1/2 cup purple cabbage, chopped thin
1/3 cup shredded carrot
1 small granny smith apple, cored and sliced thin
1/4 cup slivered almonds

Dressing:
2 tsp extra-virgin olive oil
2 tsp apple cider vinegar
1 very small clove garlic, crushed
1 tsp minced ginger
1.5 tsp raw local honey
1.5 T freshly squeezed orange juice

Make the dressing first by combining all ingredients. Let it sit for about 10 minutes and strain, discarding the ginger and garlic pulp. Combine all salad ingredients and toss with dressing. Serve immediately.


~ Becky, a skinnyfat girl

Cocomocha Brownie Sundae

It’s Sunday.  Incidentally, I am also posting a recipe for a sundae.  Coincidence?  I should think so, since sundaes aren’t just for Sunday, they are for every day of the week!  Of course, if you must use Sunday as your excuse, by all means.  You can also use the fact that these sundaes are about as easy to make as sandwiches.  So would you like a sandwich or a sundae today?  What a dilemma!  I can promise when you have this decadence melting in your mouth, you will not be thinking about how much you wished you’d opted for a sandwich.  As a matter of fact, you will likely forget all other foods exist.

The inspiration for this sundae is the The Deathstar sundae that Becky and I adore from a local vegan spot, Spiral Diner

So what would a sundae be without ice cream?  Well, in this case, it would be just a brownie.  Good, but not the best.

Coco Cocoa Ice Cream (no ice cream maker required)

  • 1 can coconut milk (full fat)
  • 2 tablespoons cocoa powder (I used raw cocao powder)
  • 2-3 tablespoons agave nectar
  • 1 teaspoon almond extract or vanilla

Mix ingredients together and freeze. 

I suggest that you keep some of this ice cream in your freezer at all times.  I mean who really wants to wait for ice cream to freeze every time you feel like a decadent treat?  I sure don’t.

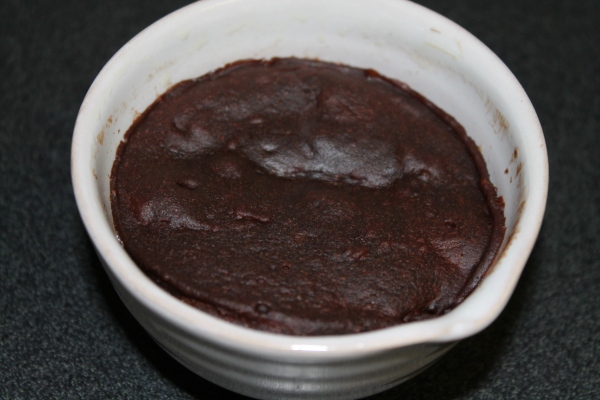
The next step is to make the brownie, of course.  This is my favorite part of the recipe because it takes less than 5 minutes to make and then it’s ready to eat!  Yep, it’s the truth.

Microwave Brownie in a Bowl

  • 2 tablespoons water
  • 1 tablespoon oil or butter (I like to use coconut oil)
  • 1/4 teaspoon almond extract (I prefer it, but you can also use vanilla)
  • 2-3 tablespoons agave nectar
  • 1 dash salt
  • 1/4 teaspoon baking powder
  • 2 tablespoons cocoa powder (I used raw cacao powder for this as well)
  • 1/4 cup white wheat flour

Mix together liquid ingredients then add dry ingredients. 

Mix well and pour batter into an oiled microwave-safe bowl or cup. 

Microwave for 1 to 1-1/2 minutes.

Now if you have decided to make this and don’t have the patience to wait for the ice cream, I completely understand.  I too was faced with a similar dilemma.  I cracked.

It was definitely delicious straight out of the bowl without the ice cream.

The second time I made it, the ice cream was ready, so I got to enjoy the entire package, which was even better. 

Cocomocha Sundae

  • Coco Cocoa Ice Cream
  • Microwave Brownie in a Bowl
  • 1/4 cup espresso or coffee
  • Whipped cream (coconut, preferred)  – optional

You’ll want to transfer the brownie from the bowl you microwaved it in to another serving dish.

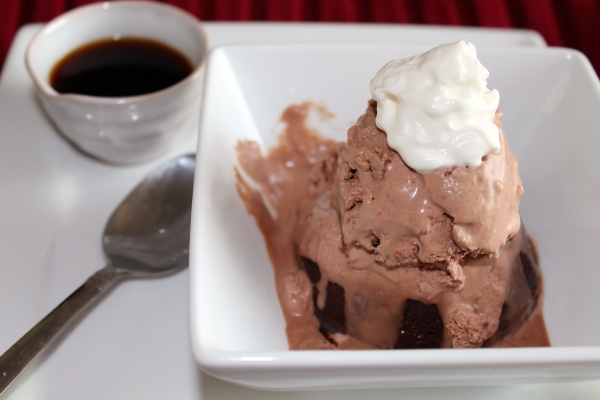
Top the brownie with ice cream and whipped cream.

All that’s left is to pour that espresso on top and let your taste buds have at it! 

I had this sundae about three separate times in the past week.  You know, only because I wanted to perfect the process and all. 

Yeah, right.

~Elesha, a skinnyfat girl

Wasabi Tofu Salad

It has certainly been an interesting spring thus far. Temperatures had already reached 90 degrees in March, Tuesday brought at least 14 tornadoes to our area, and because there was no winter, the bugs all stayed alive and there are giant flying things taking over my LIFE. Last night I went to lay in bed and found a dead earwig. I threw it away, went to lay down again and found an inchworm crawling across my pillow. What is going on?!?

But there are beautiful things happening, too. Yesterday I took a leisurely walk at sunset across our expansive, freshly-mowed lawn with the puppies trailing behind me chasing butterflies. It was as perfect as a picture. The big tree out front is already almost completely green and surrounded by irises in full bloom – the perfect setting for Sunday morning brunch. Strawberries are back in season again and I’ve been feasting on them with reckless abandon. Elesha and I have been basking in each other’s company regularly, sharing dreams and possibilities and gelato. Oh, and I’ve made some life-changing discoveries: 100% cocoa butter as a skin moisturizer and lip balm that works wonders, delicious and UHHMAAAZING Chocolove dark chocolate bars that contain just three organic ingredients, and Dr. Bronner’s soap.

Ooh ooh ooh, and this salad!

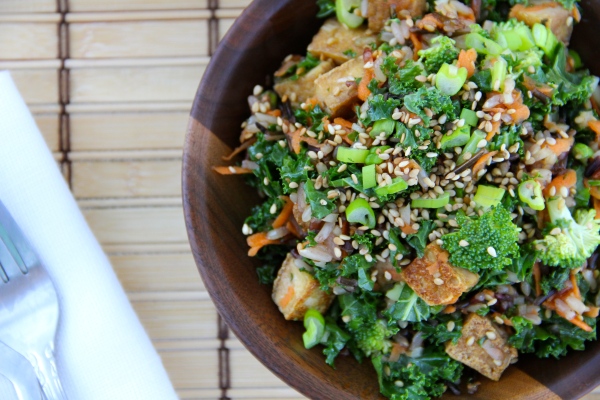
I’m always excited about a new salad. You’ll notice we have a growing list of salads under the recipes tab, and I’m just tickled to be adding another. This is much more hearty than an average side salad, and because it contains tofu and rice, I consider it a meal all by itself. Salad as an entree? Yes, please. Salad with wasabi? Mmmhmmmmmmm.

Wasabi Tofu Salad
Adapted from this recipe (just barely, and I highly recommend the original recipe as it is quite tasty as well!)

Ingredients
1/2 cup wild rice

14 oz. block extra firm tofu
2 tsp. coconut oil
2 tsp. soy sauce or Braggs liquid aminos
fresh ground pepper

4 cups chopped kale
1 cup shaved carrots
2 cups broccoli, cut into very small pieces
3 Tbsp. toasted sesame seeds
Handful of chopped cilantro
Handful of thinly sliced green onion

Wasabi Dressing

1 – 2 tsp wasabi paste (available at large grocery stores)
2 Tbsp. agave nectar or brown rice syrup
2 Tbsp. olive oil
1 T white vinegar
1/4 cup minced white onion
Juice of half an orange
Freshly grated ginger (optional)

Instructions:

1. Start by cooking your rice, because that takes longest. I use a ricemaker, which makes this step really quick and easy.

2. Cut your tofu into 1-inch slices and press between paper towels until most of the water is absorbed. You want to get the moisture out so more flavor will be sucked in. Then chop the tofu into cubes.  Heat the coconut oil in a skillet over medium heat and sauté the tofu until crispy, 5 – 10 minutes, stirring frequently. Once crispy, sprinkle with the liquid aminos or soy sauce and sauté until it has dried up and the tofu is golden. Take the pan off the burner, add a few twists of fresh black pepper, and set aside.

3. Wash, chop, and prepare your vegetables and toast your sesame seeds for just a few minutes over low medium heat.

4. Whisk together the dressing ingredients.

5. By this time your rice should be finished. Combine all ingredients and serve immediately, while tofu is still crispy. Yum!

~ Becky, a skinnyfat girl

Seitan Gyros with Whole Wheat Pita

For the past month or so, the hubby and I can’t seem to get enough Greek food into our systems.  I guess it all started when we had the most amazing hummus at a tiny Mediterranean restaurant near our home.  It’s all I can think about!  Fortunately, hummus is fairly easy to make and so is whole wheat pita, otherwise we’d be going broke right now! 

Since Becky already posted the World Creamiest Hummus, I won’t be giving you another hummus recipe, though I will mention that I like adding Greek yogurt to the aforementioned.  However, I don’t want to just give you the pita recipe and be done with it (even though the pita is definitely delicious enough to eat on its own).  Therefore, I’ve decided to make seiten gyros! 

I’m not going to give you a specific seitan recipe as they all tend to follow the same basics.  Feel free to use your favorite recipe or Becky’s version.  The main differences between recipes are how you season them and you should feel free to do this however you like.  Once you’ve cooked or boiled the seitan, cut it into thin strips, as thin as humanly possible.  I would have tried using a cheese peeler, if only I had one.  You can crisp them on a frying pan with some olive oil, if you so desire.  Here is what mine looked like when I was done.

The whole wheat pita could not be simpler.

Whole Wheat Pita

Preheat oven to 500 F

  • 4 cups whole white wheat flour (or whole wheat pastry)
  • 1 tablespoon yeast
  • 1 teaspoon salt
  • 1-1/4 cup warm water

Sift 2 cups of the flour and the yeast into a mixing bowl.  Stir the warm water and salt into the flour gradually.  Once water and flour have mixed add the final cups of flour.  Knead the dough until flour has mixed in completely.

Form dough into small balls and roll flat with a rolling-pin.

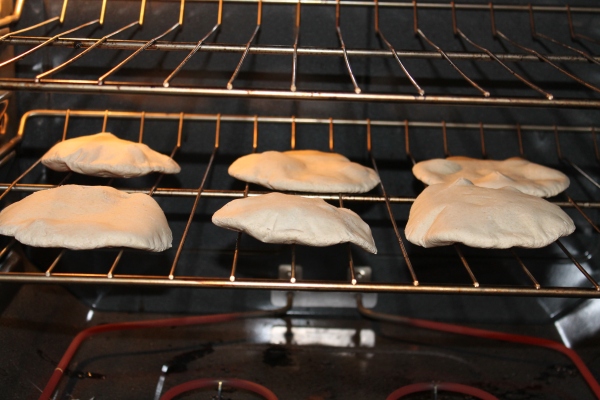
Place the pitas straight onto your oven grill and let bake until they puff up. 

It only takes a short amount of time for the puffing to occur (less than 2 minutes), so turn your oven light on and watch it. 

Once the pitas have puffed up, take them out of the oven and let cool.

While you’re waiting, you can whip up some delicious garlic cream sauce.

Garlic Cream Sauce

  • 1/2 can full fat coconut cream (it’s best if you use a can that you can’t hear the liquid in it when you shake it.  That means it’s creamed up and ready to go)
  • 2-3 roasted garlic cloves
  • 1/4 teaspoon guar gum (if not thick enough)

Blend ingredients in your blender or food processor.  I will warn you, if you use your food processor, be sure to cover up the hole on top, otherwise you will have a mess on your hands. 

Once the pitas have cooled down, cut in half and expand the pocket if  not completely hollow.  Stuff the pitas with seitan and top with your garlic cream or hummus. 

Yum!

~Elesha, a skinnyfat girl