A Skinnyfat Birthday!

That’s right, our blog is officially one year old! The time has flown, and it seems like just yesterday we wrote our very first post. But in that short time, we have changed so much. And I mean so, so much.

Fortunately, we still celebrate birthdays with cake. That’s one of those things that should never change.

When we created Skinnyfat, we had an entirely different mindset about food than we do today. Not just food, but life. Elesha and I have both grown so much, it’s almost as if we’re completely new women. It’s been a wonderful experience to share.

Just one year ago, eating was about restriction. It was about always being on a diet. It was about feeling guilty when we ate “bad” food. This blog was basically created because we saw ourselves as “too fat” and we thought we needed some type of food journal, a way to be accountable and “keep us in check”.

But this blog became so much more. The challenge of experimenting with new, healthy recipes created a deep appreciation and respect for simple, whole ingredients and the amazing health benefits that come along with them. Now, food is freedom! Healthy, life-giving whole foods are no longer something we eat because we have to or because we want to lost weight, but because they nourish our bodies, are delicious, and bring us true joy. No bad feelings are associated with food, and certainly no guilt, even when indulging. We have never felt so alive.

So even though Skinnyfat Girls was created in what I now consider a rather negative context, we are both grateful for what it evolved into and the positive effect it has had on our lives. Beyond that, it has positively impacted the lives of our families, friends, coworkers, and many of you faithful readers who have shared our health journey along the way. Thank you all for a wonderful year, and we’re excited for another one full of more great recipes!

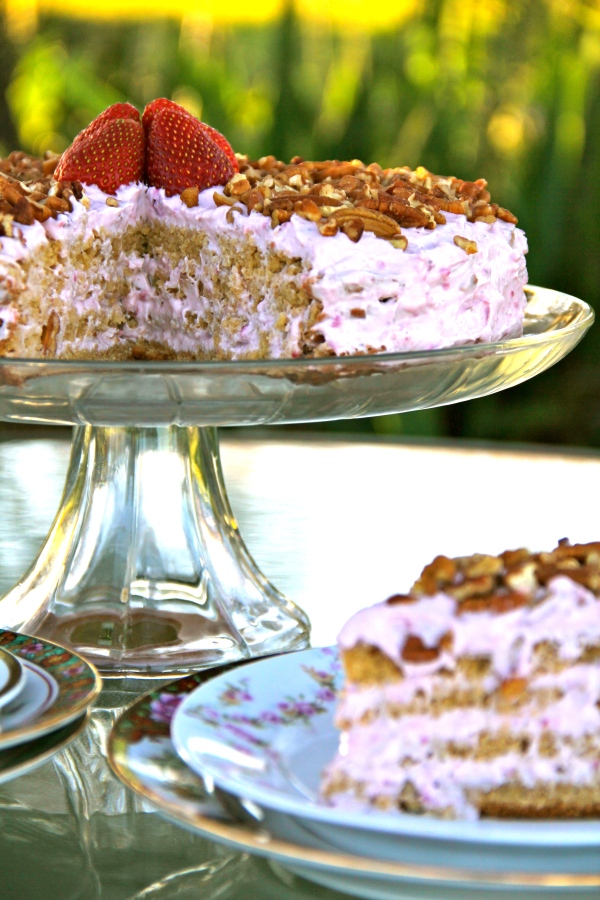
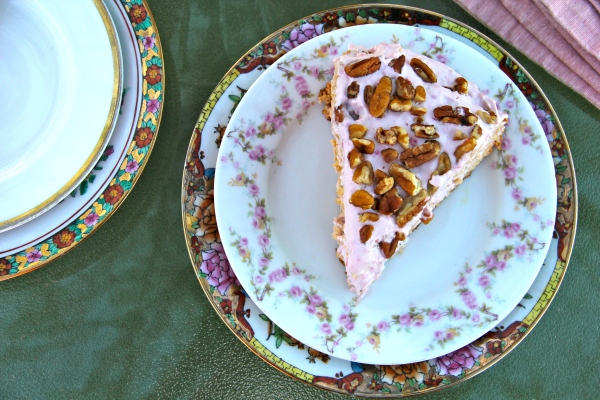
If you’re celebrating a birthday soon, give whole wheat cake a try. It feels great to indulge without all the processed junk. Try subbing out ingredients in your favorite cake recipe: whole wheat flour for white, stevia, agave, and other natural sweeteners for sugar, coconut oil for butter, and so on. I “frosted” this cake with neufchatel cheese, firm silken tofu, banana, strawberries, and stevia all thrown into the food processor until smooth. Light and delicious!

And if you’re intimidated by layers, well, don’t be! It’s easy as pie! Though, I’m not sure the person who coined that phrase ever tried to make a good pie. Good pie is no piece of cake. Aaaaand we’re back to cake. If any of you would like this particular cake recipe, let me know and I will search for it. See, this birthday post was intended to include the recipe until I lost it. Fail.

I promise to be back next time with a brand new recipe for all of you. Until that time, eat cake and celebrate life! 🙂

~ Becky, a skinnyfat girl

Bagels = Joy and antioxidants

Okay, so you know how in this post I said that pastelillos de guayaba (guava pastries) would be my next recipe attempt?  Well, I lied.  Don’t ask me why I have not yet gotten around to using the enormous stack of guava paste that I ordered in bulk from Amazon. 

In my defense, I did not realize how much guava paste I would be getting when I ordered it.  Now I will definitely get to making pastelillos de guayaba at some point, but now is not that time.  

By now you must know how much Becky and I love to add funky things to our recipes to make them more nutritious .  You can take a look at pretty much any of our recipes and see examples of this (“Greens with Ice Cream” Shake  and Chocolate Chip Blondies  are just a few).  I’ve applied this tactic with a vengeance to another food item I love, bagels

If bagels are one of the foods you’re scared to eat because they are unhealthy, fear no more.  I have rescued and remade your nutritionally void loop of unhealthy carbs into a fiberful treat for both you and your body to rejoice over. 

Here it is:

  • 4 cups whole wheat flour
  • 1.5 teaspoons salt
  • 2 tablespoons oil or butter
  • 2 teaspoons yeast
  • 1.5 cups water
  • 1 cup shredded carrots (yes)
  • 1.5 cups chopped kale (and yes, seriously)

Blend all ingredients except for yeast and flour in the blender.  Once the carrots and kale have blended in well, heat the mixture in the microwave until warm.  Then mix the flour, yeast, and liquid together in a mixing bowl.  Oil your hands and knead dough, then separate into 12 equal parts.  Let the dough rest for about 10 minutes.  While the dough rests, bring a large pot of water to a boil and preheat your oven to 425.

Once you have let the dough rest, form each section into bagels.  I found the best way to do this is to roll each section into a hamburger bun shape and then use your finger to make the bagel hole.   Once the bagels are formed, boil each bagel for about a minute on each side.  This will make them puffy and nicely shaped. 

Once boiled take bagels out and put on an oiled cookie sheet.  At this point you can dip the bagels in seeds or nuts, if you want.  I didn’t, but if I had some whole flax seeds, I may have tried.  Bake at 425 for about 5-10 minutes, then flip them and bake them for 5-10 minutes more. 

For a healthier version of cream cheese, try using greek yogurt or neufchatel cheese.  I had one with neufchatel cheese and guava paste (hey, I had to start using it somehow) and then I had another with melted cheddar cheese.  Yes, I had to have two, they were just that good!  And tomorrow, I have a sneaky suspicion I will be having a egg and cheese bagel for breakfast.

Have another favorite type of bagel?  Try your own variations of bagels and let us know how they turn out!  We love to learn new tricks!  Don’t forget like us on Facebook and follow us on Twitter!  And if you love us, help us spread the word! 

~Elesha, a skinnyfat girl

Kookoo for Coconut

Because the days of being kookoo for Cocoa Puffs are long gone.  In fact, most breakfast cereals offer the body a whole lotta nothin’ to be crazy about. Enriched flour? Check. Multiple forms of corn? Check. Giant list of chemicals, preservatives, and additives? Check, check, check. Oh yeah, don’t forget sugar – lots of it. Obviously going kookoo for coconut makes a whole lot more sense (it being a superfood and all). Clearly it’s not a cereal substitute, but it IS a marvelous milk substitute.

I will do my best to contain my over-the-top enthusiasm for homemade coconut milk and spare you an abundance of capital letters and exclamation points  going on in my brain when I think about it. Besides, any attempt at a description is futile because it is quite simply TOO DELICIOUS FOR WORDS. I could tell you all kinds of good ways to use it, but who am I kidding? The best thing to do with coconut milk is drink it in it’s pure and perfect form. In my humble opinion, pouring it over cereal or adding it to a recipe would be a waste of the most delectable nectar known to mankind. I have never been one to drink a glass of milk by itself, but now I’m a complete addict. I’m hooked on the stuff. My name is Becky and I’m a milkaholic. Cocoholic?

Apparently my over-the-top enthusiam cannot be silenced.

The recipe is simple, as you only need 2 – 3 ingredients: coconut, water, and sweetener, if desired. But simple does not mean easy, and this simple recipe takes me over an hour to make, but it’s totally worth it. I realize there are plenty of coconut milk options out there. I tried the So Delicious brand and it straight up tasted like water. Silk coconut milk is tasty, but also contains many foreign, hard-to-pronounce ingredients. As you know, I really try to avoid those.

So, if you’re willing to put in the effort, you’ll be rewarded with the most incredible coconut milk you’ve ever tasted.

Homemade Coconut Milk (of the gods)

Ingredients:
2 coconuts
Water
Sweetener of choice (optional)

Tools:
Hole-poking device
Hammer
Sharp Spoon
Blender
Mesh Strainer
Pitchers/Containers/Bowls (to strain the milk into)
Cheesecloth or Paper Towel (optional)

Step 1 (and quite possibly the most important step): Choose two of the heaviest and lightest-colored coconuts you can find. Shake them; the more juice you hear sploshing about, the better. Coconut selection is a tricky business because it can look perfectly fine on the outside and be completely rotten on the inside. Coconuts are not a commonly purchased grocery item, meaning they can easily sit on the shelf for months without anyone realizing they’re bad. Case in point:

They just LOOK innocent. Upon cracking them, I found one to be orange and gooey, another black and moldy, and the last one was pure white...and pure alcohol.

Step 2: Drain the coconut water into a container. There are three little spots at the top of the coconut; one of them is softer than the others and you can easily poke a hole through it. Cool, right? I never knew this until my Colombian husband informed me of it. Americans need to get more familiar with coconuts. The hole-poking may take some creativity on your part. I’ve been using a kabob skewer! Oh, and it’s okay if the water has little bits and pieces of stuff in it because you’re going to strain it later.

Step 3: Break open the coconuts. This is the most fun part of the milk-making process. I like to tie each of them in a plastic bag and throw it at the sidewalk with all the strength I can muster. After it’s broken, go at the pieces with a hammer until they’re all smaller and more manageable.

Step 4: Remove the meat from the shell. This is harder than it sounds. I take a sharp spoon, dig, and pry. I’ve read online that you can steam the coconut and it will separate from the shell, but I’ve yet to try it out. I used to peel off the light brown skin but found that it lengthened the process and didn’t make a difference in the flavor.

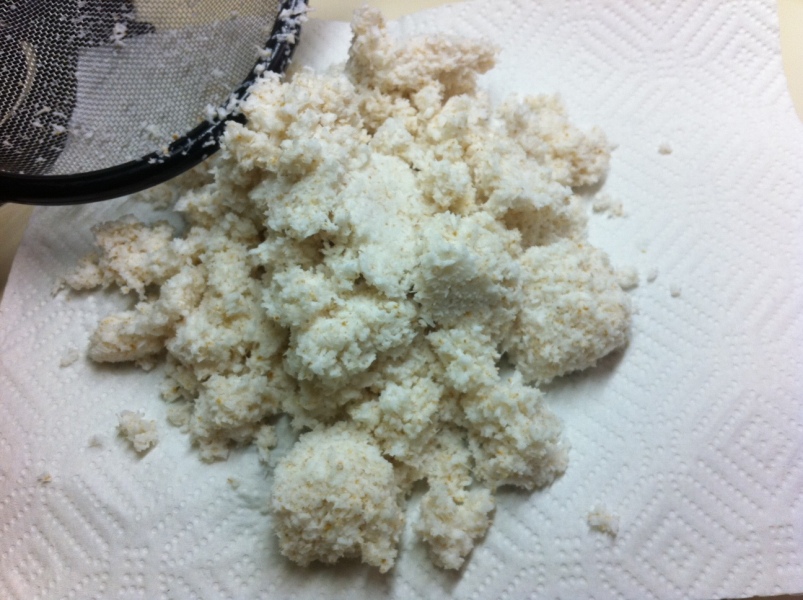
Step 5: Put half of the coconut pieces in the blender and cover with the reserved coconut water. Blend very, VERY thoroughly. Be patient, your ultimate goal here is a liquid. And remember that the longer you blend, the more flavor will be extracted from the coconut meat. Then, strain the coconut mixture into a bowl. Press with a spoon to get all of the liquid out, leaving the coconut fluffy and dry.

Step 6: Put the fluffy meat back in the blender and cover with drinking water. Add sweetener, to taste, if you like. I use a little bit of Stevia. Blend thoroughly a second time and repeat the straining process. Repeat the blend, strain, blend, strain process with the other half of your coconut pieces.

Step 7 (optional): Transfer the dry coconut meat to a cheesecloth or strong paper towel, wrap tightly, and squeeze out every last drop of milk. This is not necessary, but I like to get the most milk that I possibly can.


You can use the leftover coconut in pancakes, muffins, or other baked goods, but it usually ends up sitting in my fridge unused, so I’ve stopped saving it.


I made a little over half a gallon with two coconuts. Remember that because this milk contains no strange additives or preservatives, it will separate and small clumps will form. Stir before drinking and enjoy the clumps – they’re smooth, buttery, and my very favorite part. Chill before serving and sip to your heart’s content. Or guzzle. Either way, embrace your new addiction.

Enjoy!

~Becky, a coconutty skinnyfat girl